Friday, September 30, 2011

Lemon Balm Lip Balm


This month the children and I learned about Lemon Balm! A huge part of our herbal learning comes from an amazing e-zine by Kristine Brown, called Herbal Roots Zine. I really love this. It is wonderfully written and illustrated, has fun crafts and things to make and stories to read and interesting facts to learn, and is very very affordable!

One of the crafts from the lemon balm issue is a lemon balm lip balm. We didn't have the right type of oil for this recipe, but it came out quite good anyways.

Lemon Balm Lip Balm
(recipe from the Lemon Balm edition of Herbal Roots Zine Oct. 2009)

1/2 cup lemon balm leaves
1 oz almond or jojoba or mix
1 oz shea butter
1 oz beeswax
1/4 t. honey
1/8 t. vitamin E
Lemon, rosemary or lavender Essential Oil
12-24 Lip balm containers (We didn't have these so we used small baby food type jars, but you can buy them at places like Mountain Rose Herbs.)
Double boiler

In a double boiler, combine lemon balm, almond/jojoba and shea butter. Gently heat for about 2 hours to infuse lemon balm in oil. Do not the let oil boil! Strain out the lemon balm leaves and return the oil mixture to the double boiler. Add beeswax and let melt. Add honey, vitamin E oil and 10 drops of essential oil of choice and stir well. Pour into containers and allow to cool.
Create labels and label.

Again this is just an awesome publication and I suggest it for anyone (with or without kids) who wants to have fun with herbs and learn a lot while doing it! (I guess this post just ended up being a shamless plug for HRZ but oh well it deserves it!)

Tuesday, July 5, 2011

Short Ode to Fermentation


As the summer days move on and July goes into full swing, I find myself in the kitchen more often making bubbly brews that are not only delicious but wonderfully nutritious as well, and they keep a very long time. I love this process, a time honored tradition that I think our culture could do with a lot more of.
This process is done by cultures all around the world. When people immigrated here to America they brought their sourdoughs, or various other ferments with them. I, personally, try to ferment everything. From the ketchup that my kids eat, to our mustard, pickles, chutneys, I am even trying, for the first time, a fermented chili sauce. (That will also make a fermented chili paste. Waste not want not.) Today I will share with you the recipe for the mustard (as seen in Nourishing Traditions by Sally Fallon.)

1 1/2 cup ground mustard
1/2 cup water
2 tablespoons whey
2 teaspoons sea salt
the juice of one lemon
2 cloves of garlic (pressed, optional)
1 tablespoon honey (optional) (I added more than that.)
2 tablespoons whole mustard seeds

Mix all ingredients together adding more water as needed/desired. Top of jar should be a least one inch above mustard, cover tightly and set out on counter for 3 days. Transfer to cold storage.

Other Great resources for fermenting things:
Wild Fermentation (great website as well as an awesome book!)
Nourishing Traditions (another fabulous book)


Monday, July 4, 2011

Chocolate Black Bean Cupcakes

So as a bit of a treat, and because I have these goofy Uncle Sam guys, we made some black bean sauerkraut cupcakes for the 4th. These cupcakes are really great and we have changed them up a bit recently to refect our recent Gluten-Free-ness. We did orginally find this recipe online, I cannot remember where and we have modified it to our own purposes.

1/3 cup butter
1 1/4 cups sugar (rapuda, cane sugar, etc.)
2 large pastured eggs
2 tsp. vanilla extract
2 Tbsp. brewed coffee
1 cup black beans, soaked, rinsed, cooked, and drained
14 oz. sauerkraut, squeezed
1/2 cup unsweetened cocoa powder
1 cup flour (we used 1/2 cup coconut and 1/2 brown rice)
1 tsp. baking powder
1 tsp. baking soda
3/4 cup water

First Preheat your oven to 375F and line your cupcake tins. In a large mixing bowl, cream the butter and sugar together and then beat in the eggs. Making sure they are all mixed up well. Next add the vanilla and coffee. At this point, you put the black beans and the sauerkraut in a food processor and puree it, then add the puree to the liquid ingredients. In a separate bowl mix the dry ingredients (flour, baking powder, baking soda, salt and cocoa) then slowly add them to the liquid mix alternately with the 3/4 cup of water. Beat well after each addition. Fill cupcake tins two-thirds full and bake for 20 minutes, or until toothpick inserted in center comes out clean. Cool, then ice.
For icing we take cream cheese and honey and whip it together until it is the right consistency.
Posted by Picasa

Saturday, July 2, 2011

Popsicle Success!

 
So I tried the popsicles again this time using yorgurt as a base. Blueberries for the blue, (again it came out more purpley) strawberries for the red, and plain yogurt for the white. I have a kind of crappy plastic popsicle mold (they are BPA free though), the kind where the stick is attached to the drip guard, so it was difficult to make the layers. I made the first layer and allowed it to freeze fully without the tops on, (I had a plate over them.) The second layer we let sit until it was mostly frozen, then we added the top layer and then forced the sticks through the partially frozen layer.
Jenny from Nourished Kitchen, put up a blog post, about this (while I was still in phase one,)only her recipe used kefir. She also has really cool stainless steel molds that use sticks that aren't attached to the drip guards so it would be easier to make the layers. (You'd be able to remove the top without removing the stick.) I think I am putting those molds on my "to get" list. Well, I was able to make the layers.... now I just need to find something that would give me a darkish blue rather than a dark purple.
Posted by Picasa

Friday, July 1, 2011

Crafting: Present Bags


Since I am still in the midst of PLAN B, but I wanted to write about something. And since my daughter's birthday was last week, and my son's will be 2 weeks from now, I figured now would be a good time to show off the present bags I made.
Let me start off by saying I hate wrapping presents. Before we even get to all the issues I have with paper waste and landfills, there's just the fact that I dislike the whole process of wrapping presents. So I decided I would make them bags that we could use year after year, and that would solve all my problems. My Mother (in her infinite wisdom told me I should make it reversible so that I had Christmas on one side, and Birthdays on the other. Brilliant I thought and set to work.
They took me maybe about 2 weeks to complete, and they were rather simple to construct once I figured out my dimensions.
I made these in February but I finally got to use one last week for Rowan's Birthday. It worked out awesomely!

Picture above shows Ash's Birthday side and Rowan's Christmas side. (Ash's Christmas side looks exactly the same and Rowan's Birthday side is yellow and has ladybugs on it.)

Thursday, June 30, 2011

Attempt No. 1: FAILURE (of sorts)

So a conversation on Facebook got me thinking about holiday (in this case the 4th of July) ice pops for the kids. I thought first I would try colored infusions frozen seperately (at seperate times.) Unfortunately as you can see in the picture, it didn't exactly work out as planned.
I started with blueberries mashed up with honey and a bit of water for the blue (which came out a bit more on the purple side) and let that freeze up.
Meanwhile I made and chilled some lemon balm and hibiscus infusions.
The lemon balm pops that I usually make aren't EXACTLY white, but they are close.
Unfortunately, I had to move the sticks to pour the hibiscus infusion in, and the lemon balm infusion turned into a redish swirl..... Ah well.
Ultimately they were deemed tasty by the trusty taste testers, but they weren't red, white, and blue. I do have another idea brewing in the back of my mind which I will attempt tomorrow. We shall see how it goes.
Posted by Picasa

Monday, June 27, 2011

Herbal Lotion

Today we are going to tackle herbal lotions. There are varying ways you can accomplish this. There are endless variations of herbs and oils that you can use and it can all depend upon what it is you are trying to accomplish with said lotion. Today we will discuss something basic, a calendula and st. john's wort lotion.
First you need:
1 cup of an infused oil. (in our case since I am making calendula/st. john's wort we will use 1/2 cup of each.) Note: I am talking about an infused oil NOT essential oil. (Mine are usually infused in olive oil, but there are better oils you can use such as grapeseed or almond.)
1 ounce of beeswax


Calendula flowers infusing in Olive Oil


Put both in a double boiler and heat until melted. Then pour your mixture into your blender. (At this point I should state you need a good blender and if your blender is not so good you can ruin your motor doing this to many times. ) Let mixture cool but do not let it solidify. (about 5 minutes or so.) At this point I add:

The gel of 1-2 aloe leaves (You could add more if you wanted)
1 tablespoon Shea Butter
Now you will want to turn your blender on low setting, you can push it up to medium if you want or just leave it on low.) While your blender is on you will add:

6 tablespoons of water (You may want to add distilled water, or maybe a hydrosol of some sort, or you can make an infusion of lavender or really whatever you want and use that. After you add the water and blend the oil and water mixture together you then pour the mixture into tins/jars. At this point you may want to add a few drops of essential oil, depending on your fragrance preferences. Once your creams are cooled you can check them for consistency.
You may have to play around with the oil types, amounts, and what have you until you get something you like.

I got the main recipe for this lotion at Herb Mentor . They have an in depth video about this and it's many variables on youtube. (There are 4 parts.)


Sunday, January 23, 2011

Marshmallows


The kids, hubby (the Zymurgist over at Zymurgia ), and I made some marshmallows the other day. We got the recipe from Lesley Tierra's A Kids Herb Book, which our youngest got for Christmas. They we really easy to make and really delicious to eat. They aren't soft like ones you get in the store, but they were really good in hot cocoa. Next time I think we will have chocolate and graham crackers all ready for when they come out of the oven. (Since I don't think they would toast over a fire very well.) This book, by the way, was a great investment and is great fun for the kids, and us adults as well!


Friday, December 24, 2010

Herbs and Crafts Christmas Edition

For presents this year I first settled on making some herbal salts for everyone. I was in a craft store one day and saw some empty clear glass ornaments and I bought them. (Along with some fabric to make bags to hold them.)


Rosemary Salt in a glass ornament.

Rosemary is a traditional Christmas herb, we also gave sage salt. My husband made each recipient a cedar smudge stick to burn, and my Mother trimmed washcloths. I made each bag that everything fit nicely in and all in all I was very happy with the outcome of it all!

Sage salt, cedar stick, trimmed washcloth, and bag

We then had the children help us glue paper leaves and paper berries together for tags which we pinned to the bags with safety pins.


Finished product.
I hope everyone had/is having a great holiday and Have a Happy New Year!!


First Aid Kit

So I have been looking at first aid kits for a while. Trying to find the right one. One I can add my own stuff to but has what I would want it to have when I buy it. After looking and looking AND LOOKING, I decided to make it myself.

I decided to make two organizers and a bag for my mortar and pestle.


The organizers required a bit more thought then the mortar and pestle bag did. I wanted a place for some tincture bottles, some essential oils, a bottle of homeopathic arnica, a tea strainer, some teas, ginger chews, all that sort of thing. I also needed places for your typical first-aid supplies, bandages, band-aids, tape, scissors, and such.


The first organizer closed up.


From left to right: Top: Tinctures, band-aids, medical tape, pocket knife
Bottom: Essential Oils, Arnica tablets, gauze, salve


Left to right: Top: tea strainer, folding scissors, tweezers
2nd Row: ACE bandage, nail clippers
3rd Row: thermometer, sling
Bottom Pocket: cotton swabs, cotton balls, teas, ginger pieces, matches,
extra material, etc.

I am really happy with the way they came out. I bought an army messenger bag from Amazon. In the beginning I was planning on making pockets in the bag itself, but this worked out much nicer I think.


Saturday, September 11, 2010

Problem Solved


I dry my herbs by hanging them on sticks. I then hang the sticks out in the garage from the rafters until the herbs are dry. While I am placing the herbs on and taking them off the stick, I am in my living room as it has the biggest clearest space for working. My biggest problem with this arrangement is; Where do I put the stick while I am trying to work? I would usually try to hang it from the cabinets, my pan rack, and various other things, much to my dismay and the dismay of those around me. But, no more. My husband surprised me with a rack he made out of a pallet. I painted it. It looks better then it did unpainted, but I will be the first to admit painting is not a strong point of mine.


This is what it looked like when we first hung it, but it swung to much so we had to rethink our hanging method. I have no idea why we thought that was going to work, but as soon as I put the stick up there we knew it wasn't going to be okay.


This is the final result we decided on two lengths of chain so that we could keep it up high when it's not in use, and lower it so that I can actually reach it when I am using it.


All in all we are very happy with it, and it didn't cost me a thing except the price of the chains which was like 5 dollars. I am especially happy that I will not have to play "hang the stick" with the kitchen cabinets anymore!

Sunday, August 29, 2010

Apples and Cinnamon in Brandy


So we are on week 4 of The Nourished Kitchen's Preserve the Bounty Challenge. This week was preserving in alcohol and I had a very hard time deciding what I was going to do. I finally settled on Apples (since I had just gotten a bunch from my CSA) with some cinnamon chips in brandy. I think I will have to try this with a few more fruits before the season is over!!

I am aware that this is a rather short blog but I really have nothing else to say about this, except it looks incredible and I can't wait to try it!!

Tuesday, August 24, 2010

Presevering in Vinegar


This week, as part of the challenge from Nourished Kitchen, I tried my hand at preserving in vinegar. (Also known as pickling.) This was great as I have a lot of cucumbers right now. I know that it is neither particularly interesting or different, but as I said I have a lot of cucumbers so it just seemed the thing to do. I added celery seed, mustard seed, peppercorns, a bay leaf, and some crushed leaves of Thia Basil. I'm not exactly sure why I chose these spices (and herbs), they just sounded good to me at the time. Pickling is seriously probably one of the easiest ways to preserve things and it's awful tasty too!!

Thursday, August 12, 2010

Preserving in Oil


So I am participating in The Nourished Kitchen's Preserve the Bounty Challenge. This week the challenge was oil preservation. I was really hoping to do eggplant, because it sounded so yummy, but I didn't see any at the farm stand I was at. So I bought a few more tomatoes. I have bought an awful lot of those lately, but considering I wasn't really expecting to do this and my weekly budget was already kind of tapped, I didn't have a whole lot of options. I definitely want to try this technique with some eggplants when I find some.

The process itself was pretty straight forward. I used some tomato wine, (my husband's boss made it and gave us some and it went to vinegar) in place of the bit of cider vinegar. I thought it might be a nice touch. I also went out and raided my Thai Basil plant that is in my garden of quiet a few of it's leaves. I probably won't be able to raid it for a while again. (oops.)
The oil was olive oil.

It looks super tasty. Can't wait to try it.

Monday, August 9, 2010

Eating in Season


Eating in season is something I have been trying very hard to incorporate into my family's life. We do fairly well for the most part but we continually try to do better. We belong to a wonderful CSA here in Vermont, Maplewood Organics. They supply us with heavenly produce all summer long and we occasionally buy some of their grass-fed beef. (Okay, enough of the shameless plugs.) Well today was a pick up day and I found myself with a mid sized bundle of kale, among other things. Now normally all kale in this house is systematically turned into kale chips and almost instantaneously inhaled by my children. My son enjoys it so much that he is growing a kale plant in our garden. We decided, however that today we had way too much to be turning into chips so we stopped off at the farm stand and grabbed some tomatoes and made some Tomato and Kale Pesto Pizza. This pizza is a real treat and easy to do!!

The dough I used is a standard pizza dough recipe. If you don't have a standard dough recipe you like to make, I am sure a quick search will yield tons of results. Once you have your dough together then:

Preheat oven to 350.

2 cups (packed) of fresh kale
3 cloves garlic or 3 garlic scapes
1/3 cup sunflower seeds
1/4 cup olive oil
2/3 cup ricotta cheese
2 cups sliced tomatoes (seeded, if you like)
2 oz. fresh mozzarella cheese

Make a pesto with the kale, garlic, sunflower seeds and olive oil in a food processor. Transfer the kale pesto to a medium mixing bowl and mix in the ricotta. Take your pie crust and spread the kale pesto cheese mixture all over it. (Leaving a border of about an inch or two.) Then top with the sliced tomatoes and then the fresh mozzarella.Bake for about 15-20 minutes or until cheese is melted and the crust is cooked. Allow the pie to rest for about 5 minutes before cutting.

The summer is SO GOOD!

Sunday, August 8, 2010

Lacto-fermented Ketchup


This weekend we bought our second bushel of tomatoes. Since we turned the entire first bushel into tomato sauce for the winter we decided to try our hand at making tomato paste with some of this bushel. The paste came out fairly well, I think will pulverize it next time by using a food processor or something. But it's definitely edible and that's aways a good thing.
I then decided I was going to make some ketchup out of the paste we had made up. I had read somewhere, probably on one of the many food blogs I follow, about being able to make a lacto-fermented ketchup and since I am a fermentation nut I decided that I would give it a try.

There are a bunch of lacto-fermented ketchup recipes online and I just kind of sifted through them and made up my own version of what I thought would A) ferment properly and B) taste good.

This is the recipe I ended up using:
About 16 oz of tomato paste (this is what I had made up to work with)
about 1/4 cup water (you would probably need a bit more if you were using store bought paste.)
3 tablespoons whey (I stole mine from some yogurt I had made.)
1 tablespoon Apple Cider Vinegar
Now this part gets a bit sketchy: I used dry mustard, cinnamon, cloves, allspice, and cayenne pepper. A couple of pinches of each. I used a bit more mustard and cinnamon then I did the others.
1 freshly mince garlic clove
1/4 cup molasses (you could really use any sweetener here either molasses or honey or even sugar if you wanted to.)

I poured all the ingredients in a ceramic bowl. (I would use ceramic or glass, definitely not metal!) Whipped it all together with a wooden spoon and put it in some glass jars. Taste it once in a while while you're making it so you don't over spice (or under spice.) Placed the tops on the jars and let them sit on the counter for 72(ish) hours. This allows it to ferment a bit. After that just store it in your fridge.

Like I said I mostly got this recipe by taking parts of other's recipes here on the Internet. Incorporating the things in the recipes I did have on hand and swapping out things I didn't.
All in all I would say this turned out to be a total success and we will definitely be making this one again.


Both of the kids not only enjoyed making their own ketchup they both enjoy eating it as well!

Thursday, July 1, 2010

Peppermint Soda

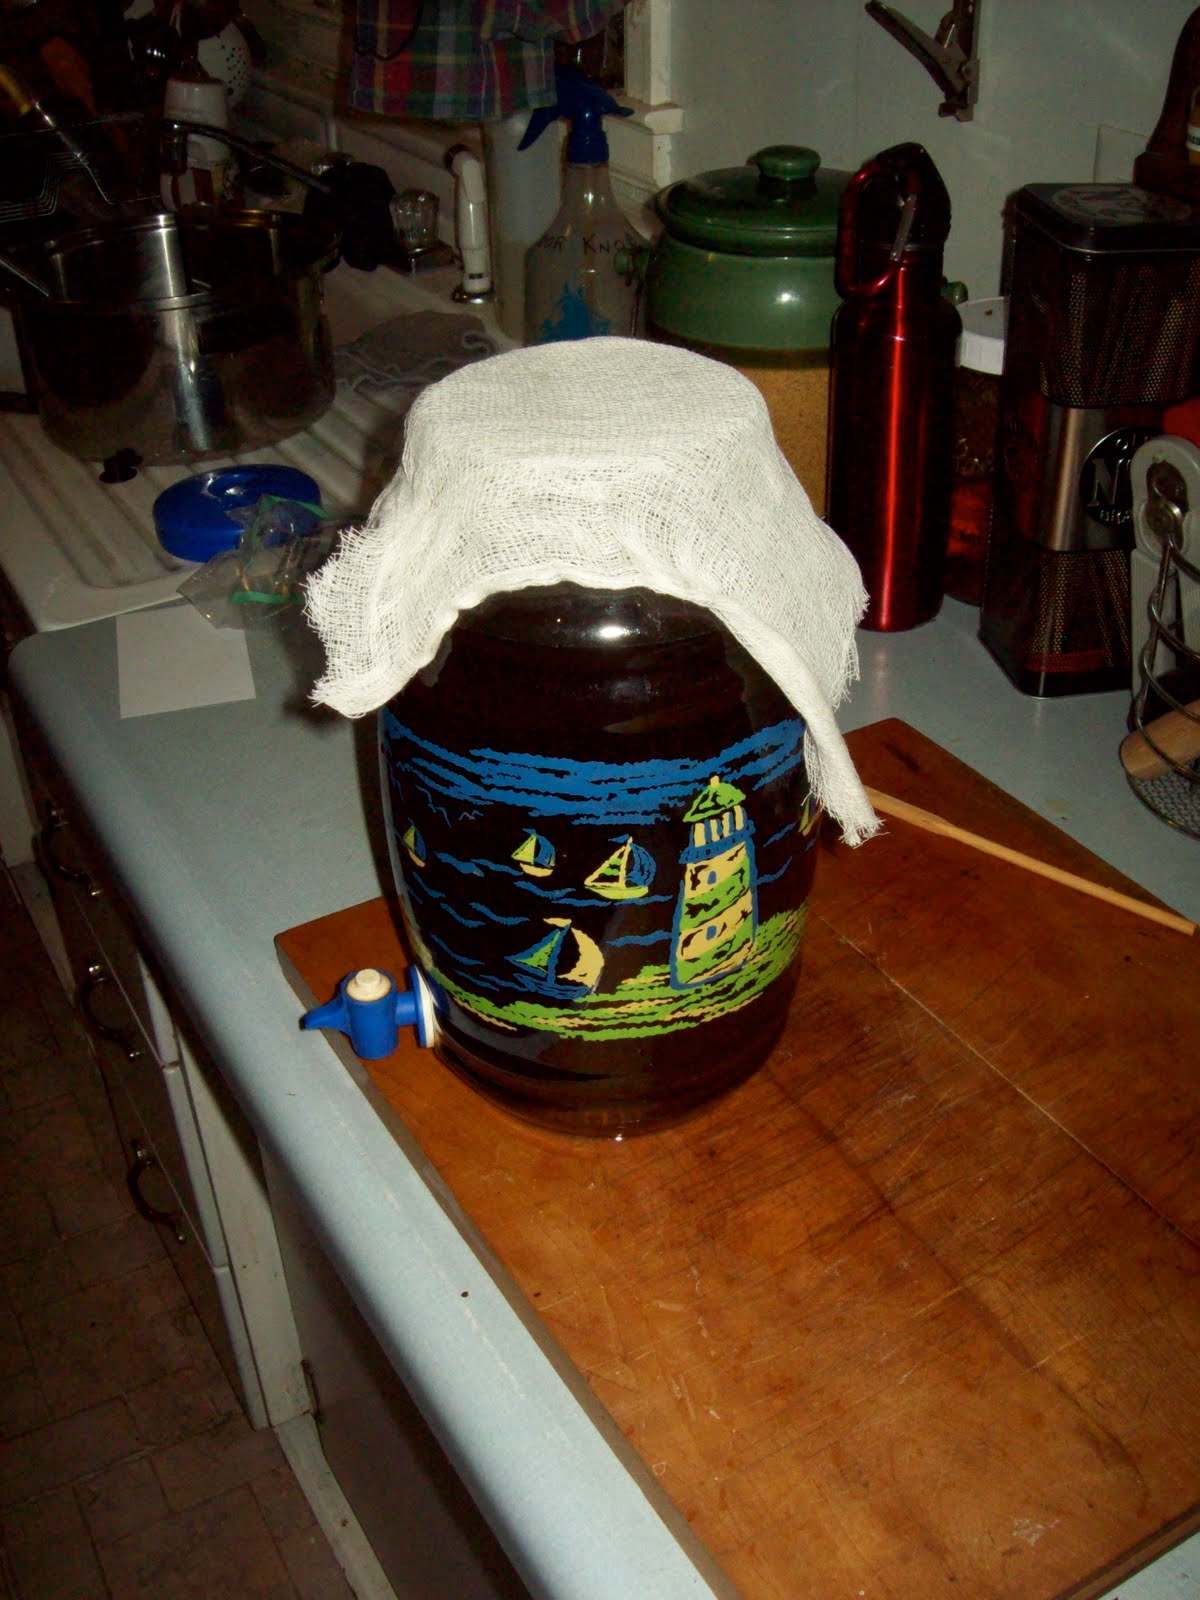
Two weeks ago I started a ginger culture so I could make some lacto-fermented soda. I am not going to go into how to make it as there is an awesome tutorial on youtube and this is the second part.Anyways, I did want to share with you my experience trying a different type of soda considering that the recipe is actually for a ginger soda. Well I have no idea how it turned out as I only bottled it yesterday and have until Saturday before I should try it. I decided to use 1.5 oz. of fresh peppermint leaves from my garden.

Now that I think on it I probably shouldn't have used as much lemon juice as I did, I imagine it will be a lot like peppermint lemon soda.

As you can see I use a gallon size iced tea jug, cheesecloth, and rubber band to keep the soda in until we bottle it.

I will update this post in a few days to let you know how it went.

EDIT: Well we tried it last night and I have a little video showing how it went.

Thursday, June 10, 2010

Chickweed Pesto

I have a ton of mouse ear chickweed (Cerastium vulgatum) growing all over my yard right now. Mouse ear chickweed is really hairy and it is recommended that you cook it, however I find that making it into pesto is another really tasty way you can consume it.


First I take my chickweed (I used mouse ear cause it's what I have but there are various ones you can use,) and I chop it up and put 2 cups of it into my food processor.


Then I add about 3 tablespoons of sunflower seeds (you can use pine nuts but they are awfully expensive.) 1/4 to 1/2 cup olive oil, 1/2 cup Parmesan cheese, and a tiny pinch of salt. Wiz that up in the processor and I have chickweed pesto.I use this pesto in sauces, dips, salads and tons of other places. Yummy!

Tuesday, May 18, 2010

Bedtime

I am posting this blog as an entry in Mamapoekie's radical parenting blog carnival..


However,keeping in "theme" with this blog it will be herbally based.

My kids are hyper, no strike that, my kids are insanely hyper. We are an unschooling family who spends a majority of their day completely in unstructured learning. We are outside, inside, reading, playing, moving and shaking, and by the time it comes to bedtime I'm pretty beat. My kids however, are not.
I will be honest bedtimes aren't easy for us, and they used to be a lot worse. Oh the act of putting them to bed went smoothly enough, but as soon as we would leave the room, the trouble would start, and it wouldn't stop. 50 attempts to "go to the bathroom", 100 different instances of "I need a hug" or "can you tuck me in?" All in themselves no big deal but this is the 50 time just in the last 20 minutes!! This doesn't include all the "infighting" and the "please don't make Mommy come down there, I can hear you, go to sleep please."
Now at this point we can cue the "well you need a routine" crowd. Well we have one. We have had several in fact over the course of the years, (the kids are 5 and 7) and none of them seemed to be very helpful. You can't believe how exciting even the most boring book can be to a kid who is NOT going to bed anytime soon.
I have, at long last, found a bit of an answer to our little problem. Passion flower and lavender.
Lavender (Lavandula spp.) is one of my very favorite herbs for relaxation. Lavender is a nervine, and a sedative, and it also smells just wonderful. (Or at least I think so.) In this instance, I just use a dab of essential oil on their pillows.
Passion flower (Passiflora incarnata) is also a sedative. This we usually sip as a tea or make into lozenges. To make the lozenges you first simmer about 1-2 tablespoons of passion flower in 1/2 cup of water for about 10 minutes, then strain the plant material keeping the "tea." You can add honey at this point to the hot "tea", we used to but my kids don't seem to notice that I stopped so I don't think I will anymore. (he he) Then add this "tea" to 1/2 cup of slippery elm powder and mix.


There doesn't that look yummy? Next you turn it out on to a space where you can roll it out, using extra slippery elm powder as you would flour, if these were cookies. Your going to cut them out like cookies too, only using something really small. I use the top to a salt shaker that I have.


Then I just leave them out to dry on a cookie sheet. Occasionally I have to turn on the oven REALLY LOW and finish the drying in there for a few minutes, but it can be rather damp here on the lake. We keep some lozenges made up because, hey, life happens. We're not even always home 20 minutes before bedtime, or maybe we haven't realized it IS almost bedtime!! I like to have them for those instances.
Most nights we snuggle up to a nice cup of passion flower tea and read our story. Unwind from the day and enjoy each other. Then time to tuck in and drift off to sleep smelling the lavenders. (We've also added some ocean/nature sounds coming from the next room.) Do we still have the occasional straggler, a "defiant" child protesting their right not to sleep? Sure. But it doesn't last as long.


What does any of this have to do with being a "radical parent" probably nothing, but it was really the only thing I could think of to write about.

Monday, May 3, 2010

Natural Hair

There are a lot of ways you can "go natural" with hair care products. You can spend a small fortune on pre-made products that still contain the occasional questionable ingredient....or, you can make your own. These are two easy recipes I use often for my family's needs.

"Shampoo"
For this I combine 1 cup of liquid castile soap to 1 cup of water and add 1 teaspoon of olive oil. I usually mix all the ingredients into a spray bottle for easy application, but you can really do this into any container that takes your fancy. I have not really gotten into making my own castile soap (yet!) but there are some really great recipes here: Castile soap recipes if you would like to try and do so.

"Hair rinse/detangler"
For this I infuse an herb or two, usually rosemary or horsetail, in apple cider vinegar.


I usually make this at a ratio of 1 cup to one quart. So in this instance I have 1/2 a cup of rosemary and 1/2 quart apple cider vinegar. I let sit at least over night and strain the next morning. Then I add 1 part water to to my 1 part vinegar infusion (in this case 1/2 quart of each) and I have my hair rinse. I also keep this in a spray bottle for easy application.

I have also recently stumbled upon this list of recipes that looked really good so I thought I would pass them on. Long Locks hair care recipes
Enjoy!